Chocolate Coffee Whoopie Pies are the ultimate handheld indulgence for anyone who lives for the combination of deep, dark cocoa and bold roasted espresso. These aren’t your average sandwich cookies; they are soft, matte-textured espresso cakes that melt in your mouth, paired with a smooth coffee-infused cream filling that provides the perfect caffeine kick. Whether you are prepping for a bake sale or just craving a sophisticated treat, these Chocolate Coffee Whoopie Pies offer a bakery-quality experience right in your own kitchen.
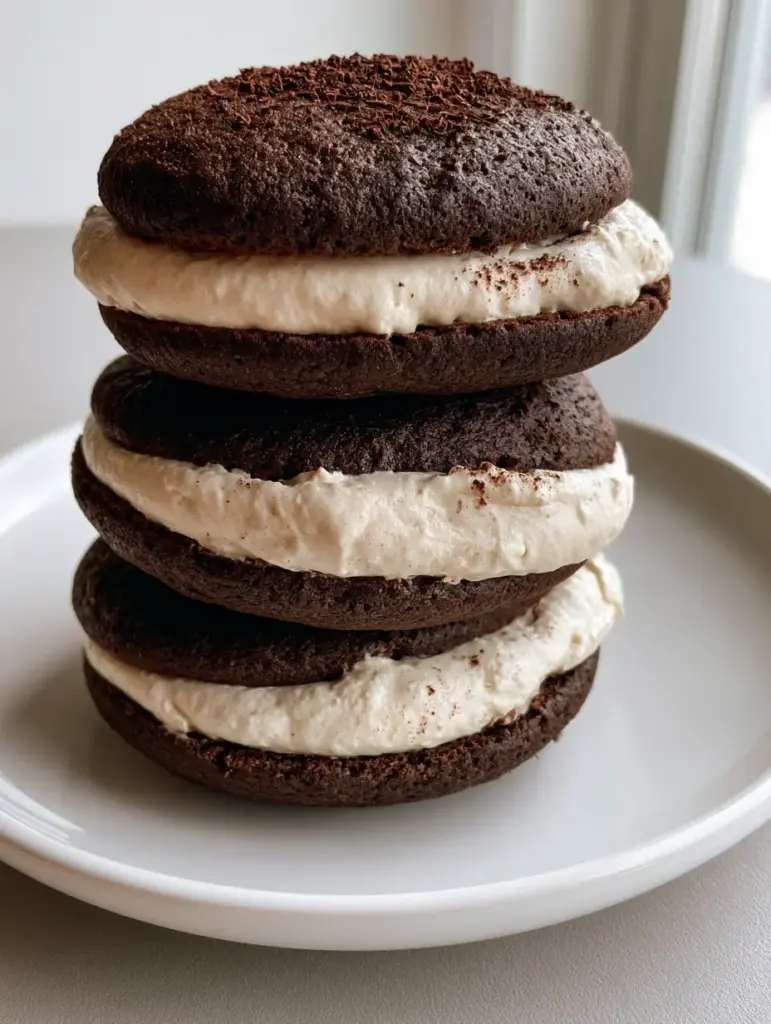
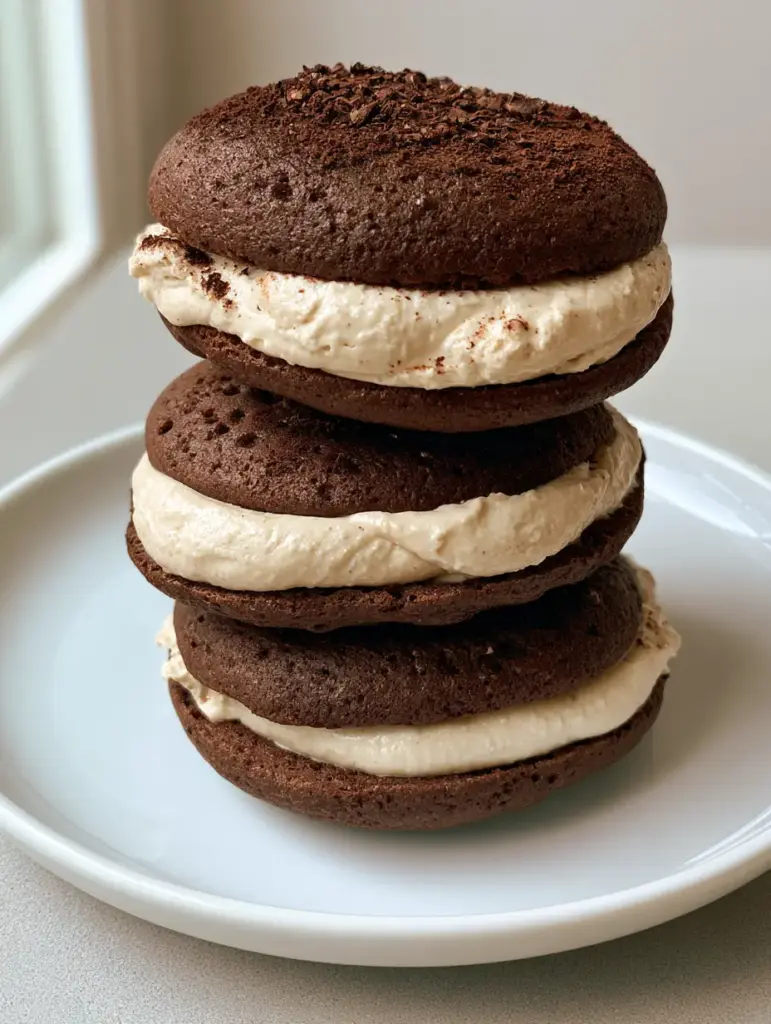
The secret to these Chocolate Coffee Whoopie Pies lies in the balance of textures. We aren’t looking for a crunchy cookie; we want a slightly porous, domed cake that holds up to a thick layer of piped cream. When you bite into one, the dusting of dark cocoa powder hits your palate first, followed by the crunch of granules of instant espresso, leading into the pillowy softness of the cake. It is a multi-sensory experience that looks just as good as it tastes, especially when served on a clean white ceramic plate.
Why You Will Love These Espresso-Infused Treats
- Perfect Matte Texture: These cakes have a beautiful, slightly porous surface that absorbs just enough moisture from the filling to stay soft for days.
- Double Coffee Hit: We use coffee in both the cake batter and the buttercream, then top it off with espresso granules for a bold flavor profile.
- Visual Sophistication: The contrast of the dark chocolate cakes against the off-white espresso cream looks stunning on any dessert table.
- Better Than Cookies: If you love matcha white chocolate cookies, you will adore the cake-like consistency of these whoopie pies.
Essential Ingredients for Success
Creating the perfect Chocolate Coffee Whoopie Pies requires a specific set of ingredients to ensure the cakes rise correctly and the filling stays stable.
For the Dark Chocolate Espresso Cakes
- All-Purpose Flour: 2 cups (250g). This provides the structural foundation for the domed cakes.
- Dark Cocoa Powder: 1/2 cup (45g). Use Dutch-processed cocoa for that deep, dark color and smooth flavor.
- Instant Espresso Powder: 2 tablespoons (10g). This intensifies the chocolate and provides the primary coffee note in the cake.
- Baking Soda & Baking Powder: 1 teaspoon (5g) each. These chemical leaveners ensure the cakes achieve that signature “dome” shape.
- Unsalted Butter: 1/2 cup (113g), softened. Fat is crucial for a tender crumb.
- Brown Sugar: 1 cup (200g). The molasses in brown sugar keeps the cakes moist and soft.
- Large Egg: 1 at room temperature. This binds the batter together.
- Buttermilk: 1 cup (240ml). The acidity reacts with the baking soda to create a light, porous texture.
For the Smooth Espresso Cream Filling
- Unsalted Butter: 1 cup (226g), softened. The base for our silky pipeable filling.
- Powdered Sugar: 3 cups (375g). Provides sweetness and structure.
- Heavy Cream: 2 tablespoons (30ml). Thins the frosting to a smooth, spreadable consistency.
- Instant Espresso Powder: 1 tablespoon (5g), dissolved in the cream. This ensures an even, off-white espresso color without grittiness.
How to Make Chocolate Coffee Whoopie Pies: Step-by-Step
1. Prepare the Espresso Cake Batter
Start by preheating your oven to 350°F (175°C). Line two large baking sheets with parchment paper to prevent sticking. In a medium bowl, whisk together the flour, dark cocoa powder, espresso powder, baking soda, and salt. This ensures the dry ingredients are aerated and free of lumps.
In a large stand mixer, cream the softened butter and brown sugar together on medium-high speed for about 3 minutes. You want the mixture to be pale and fluffy. Add the egg and vanilla extract, beating until well combined. The mixture should look smooth and emulsified.
2. Mixing the Liquid and Dry Ingredients
Turn the mixer to low speed. Alternately add the dry flour mixture and the buttermilk in three additions, starting and ending with the dry ingredients. Do not overmix! Overworking the gluten will result in tough cakes rather than the soft, porous texture we want for our Chocolate Coffee Whoopie Pies. Stop as soon as no flour streaks remain.
3. Scooping and Baking for the Perfect Dome
Using a medium cookie scoop (about 2 tablespoons), drop mounds of batter onto the prepared sheets, spacing them 2 inches (5cm) apart. These will spread slightly and rise into dark chocolate-espresso cakes. Bake for 10-12 minutes. The tops should spring back when lightly touched and have a matte, slightly porous appearance.
Allow the cakes to cool on the baking sheet for 5 minutes before transferring them to a wire rack. They must be completely cool before you add the filling, or the cream will melt. While these cool, you might consider prepping some peppermint hot chocolate cookies for your next holiday baking session.
4. Whipping the Espresso Cream Filling
While the cakes cool, prepare the filling. In a clean bowl, beat the softened butter until creamy. Dissolve the instant espresso granules into the heavy cream before adding it to the butter along with the powdered sugar. Whip on high speed for 3-5 minutes until the filling is thick, smooth, and off-white.
5. Assembling the Whoopie Pies
Find two cakes that are similar in size. Pipe a generous mound of the espresso cream filling onto the flat side of one cake. You want the filling to show a slight swell between the cakes when pressed. Top with the second cake and press down gently until the filling reaches the edges.

Expert Tips for the Best Whoopie Pies
- Use Room Temperature Ingredients: Ensure your egg, buttermilk, and butter are at room temperature to prevent the batter from curdling.
- Sift Your Cocoa: Cocoa powder is notoriously lumpy. Sifting it with the flour ensures a smooth cake texture.
- Pipe the Filling: For that professional look seen on a white ceramic plate, use a large round piping tip rather than a knife to apply the filling.
- The Resting Period: Whoopie pies actually taste better after sitting for a few hours. The cake softens as it absorbs moisture from the filling.
- If you enjoy small bites, try these mini pumpkin cheesecake bites for your next party.
Storage, Reheating & Freezing
Storage: Store your Chocolate Coffee Whoopie Pies in an airtight container in the refrigerator for up to 5 days. Because of the butter-based filling, they are best served at room temperature, so take them out 30 minutes before eating.
Freezing: These freeze beautifully. Wrap each pie individually in plastic wrap and store in a freezer bag for up to 3 months. Thaw in the refrigerator overnight.
Visual Finishing Touches
To achieve the exact look of our Visual Recipe Blueprint, don’t forget the final garnishes. Once the pies are assembled, place them on a white ceramic plate. Use a fine-mesh sieve to apply a light dusting of dark cocoa powder over the top cake. Finally, sprinkle a few granules of instant espresso over the cocoa. The contrast of the dark powder against the matte cake and the white plate creates a stunning, high-end aesthetic.
Frequently Asked Questions
Yes! In fact, they taste better the next day as the moisture from the espresso cream softens the cakes further. Store them in the fridge and bring to room temperature before serving.
Espresso powder provides a more concentrated flavor without adding extra liquid. If you use brewed coffee, you must reduce the buttermilk to maintain the correct batter consistency.
The matte, slightly porous finish comes from using dark cocoa powder and avoiding high-fat washes on top. Letting them cool naturally on a rack also helps set the surface texture.
This usually happens if your leavening agents (baking soda/powder) are expired or if the batter was overmixed, which removes the air bubbles needed for a high rise.
The Ultimate Chocolate Coffee Whoopie Pies Recipe
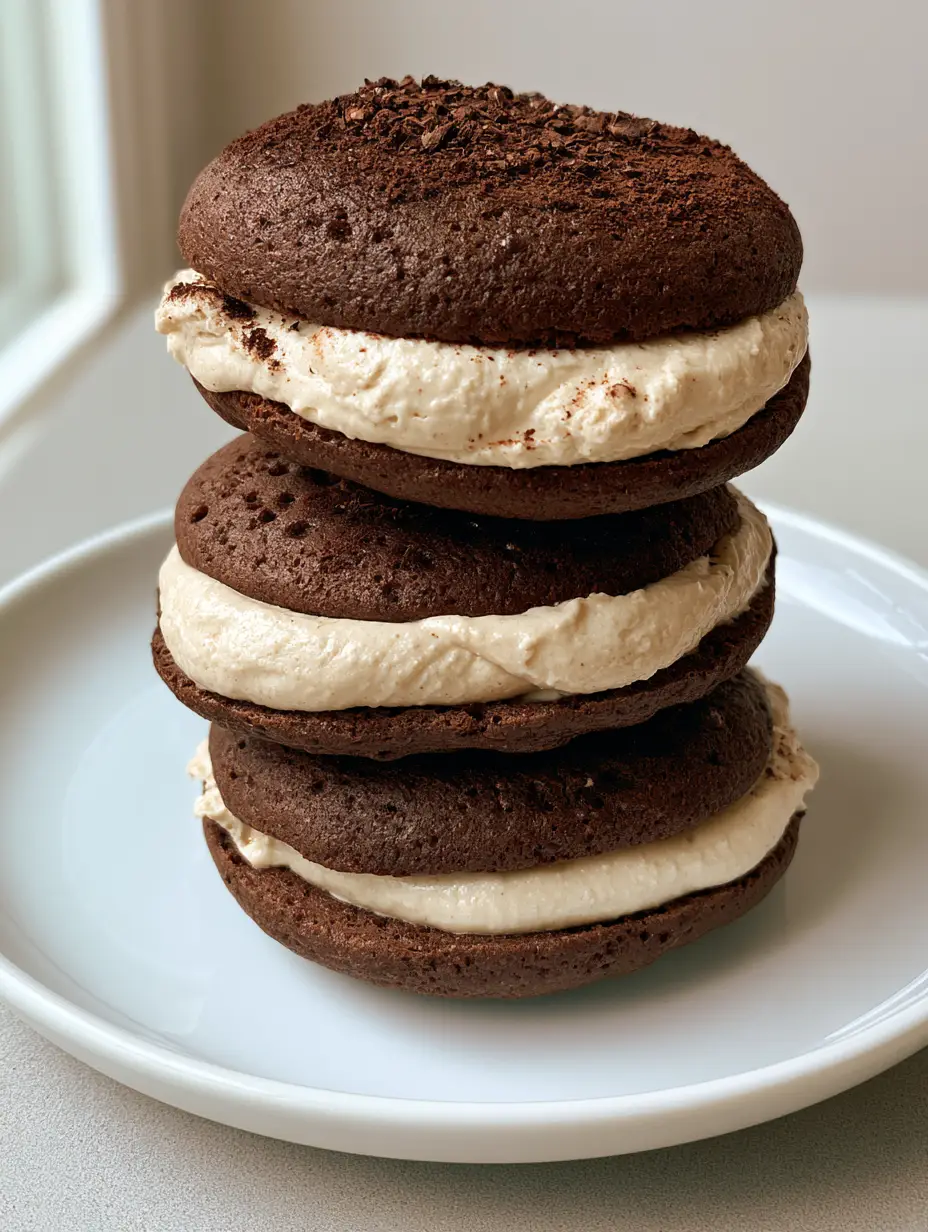
Chocolate Coffee Whoopie Pies with Espresso Cream Filling
Ingredients
Equipment
Method
- Preheat oven to 350°F (175°C). Cream butter and brown sugar until fluffy. Add egg and vanilla, beating well.
- Whisk dry ingredients. Alternately add flour mixture and buttermilk to the butter mixture, beginning and ending with flour.
- Scoop 2-tbsp portions onto lined sheets. Bake 10-12 minutes until matte and springy. Cool completely.
- Whip softened butter, powdered sugar, and espresso-infused cream until smooth and thick.
- Pipe espresso cream onto the flat side of one cake. Top with a second cake. Dust with dark cocoa and espresso granules.
Notes
Ensure cakes are fully cooled to prevent the filling from melting.
Join the Community!
If you made these Chocolate Coffee Whoopie Pies, I want to see them! They look incredible stacked three-high on a plate. Please save this recipe to your Pinterest dessert board so you never lose it. Follow mia_munch for more decadent baking inspiration. Did yours turn out soft and porous? Share a photo in the comments below and leave a 5-star rating to help other bakers find this mocha treat!